Showing posts with label dessert. Show all posts

Thursday, June 13, 2013

Fried Ice Cream


I am not into the sappy romances. Every time I watch a romantic comedy, and it comes to the cutesy ending scene, I get all squirmy and hide under a blanket until it’s over.

Really mature, I know.
 
For this reason, I’m not Nicholas Sparks’ biggest fan. I don’t have anything against him, but I have a hard time controlling my scoffs and eye-rolls during his books and movies when things get cheesy (which is often).

However, Sparks’ book Safe Haven (which is also a movie that came out this year) caught my attention because it mentions Fried Ice Cream. And I really wanted to make fried ice cream.


When the couple is talking about going to a local carnival (which in the movie is changed to a parade), the dashing male love interest, Alex, says to the mysterious, beautiful out-of-towner, Katie,
 
“‘And if you ask me nice, I’ll treat you to some deep-fried ice cream.’
“‘Fried ice cream? It sounds disgusting.’
“‘It’s actually tasty.’”

(I forgot to write down the page number before I went out of the country, but it’s toward the end of the book, before the climax.)

Yeah, that’s not a very big role that my little treat plays, but like I said, I really wanted to make fried ice cream.

“But fried ice cream?” you ask.  “Come on, that isn’t possible.”

Actually, it is. And it’s super easy. And delicious.

For the recipe, I just followed this video:


But if you want it written out, here’s the recipe. It looks way more complicated than it really is, I promise.

Fried Ice Cream

Ingredients:
1 quart Vanilla ice cream
3 cups Cornflakes
4 Egg whites (the video says 3 -- I needed more)
Oil for frying

Suggested toppings:
Honey
Whipped cream
Cinnamon
maraschino cherries
  1. Line a cookie sheet with waxed paper. Place 8 scoops of ice cream on the waxed paper. Place in freezer and freeze for 1 hour.
  2. Place cornflakes in a gallon ziplock bag and roll over them with a rolling pin until mostly crushed, but not powder. Pour into a medium bowl. Mix egg whites and water in a bowl until combined.
  3. Remove ice cream balls from freezer. Moving quickly, pick up each ball of ice cream and roll it in the egg whites until completely covered. Then roll in the corn flakes. You may do this process twice if you want a crispier outer shell for your fried ice cream (recommended!). When all of the ice cream balls are coated, return to the freezer immediately. Freeze for 3 hours, to make sure the ice cream gets very hard. Otherwise it will turn into a puddle when it is fried!
  4. When the 3 hours are up, heat about an inch of oil in a pan (the video says 4 inches -- you don't need that much!). You don’t want your oil to be crazy-hot. I waited until I could see the oil start to get swirly – not quite boiling, but definitely moving. Drop a drop or two of water in the oil – If it immediately bubbles, the oil is ready.
  5. Only remove your ice cream from the freezer as-needed. I chose to fry the ice cream one at a time to be safe. Keep the rest in the freezer because, duh, it’s ice cream, and you don’t want it to melt.
  6. Drop an ice cream ball into the oil and use a slotted spoon to turn it over in the oil so it cooks on all sides. The corn flakes will turn slightly darker brown and will feel crisper. Remove from the oil after 30 seconds.  Don’t go much longer, or it won’t be ice cream anymore!
  7. Place ice cream in a bed of paper towels and blot a little to remove excess oil. Then place in serving dish. Top with a swirl of honey, a dollop of whipped cream, a couple shakes of cinnamon, and a cherry.  Then you are free to enjoy this hot-and-cold, sweet-and-salty treat!

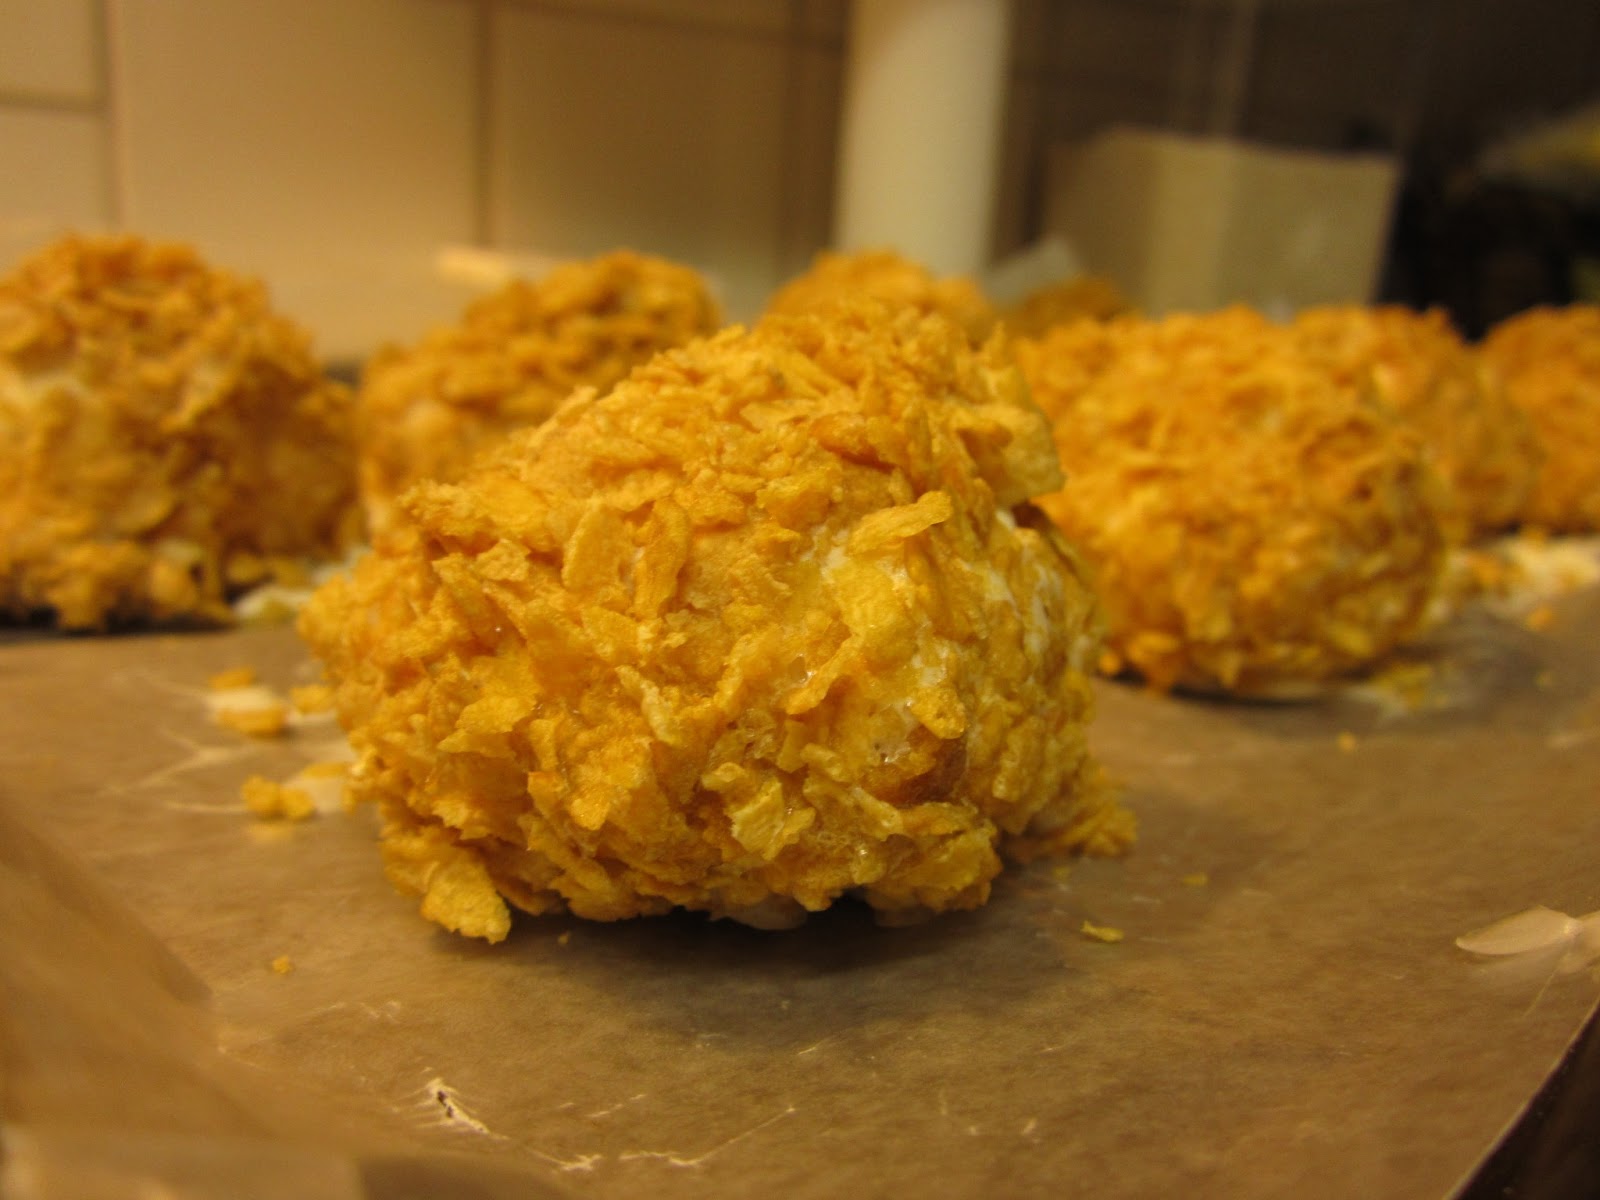
Before freezing the second time

Frying!

It sounds complicated written out, but I promise it’s not. Just watch video like I did and you’ll be fine.

A cool thing about this treat is that once you freeze the ice cream with the egg whites and cornflakes on them, you can keep them in the freezer and pull out an ice cream ball to fry whenever you want! Perfect for serving at small parties when you want to show off!

Wednesday, June 5, 2013

French Flan with Sugared Almonds


Sometimes you just have to feature the classics. Today, that classic is Madame Bovary, by Gustave Flaubert, which takes place in semi-rural 19th century France.

Most of the time when I blog about food from a particular book, it means that I like the book. Not in this case. In fact, I quite detest this book.
 
*Gasp!*  A girl with an English degree who hates Madame Bovary?  How could I?

The real question is, how could I not? This story is all about an extremely selfish woman who has a great life and completely ruins it because she is greedy, envious, lustful, immature, and whiny. She is a sad excuse for a woman, and it makes me angry that she has become a pinnacle character in western literature.

Of course, the writing is beautiful, and the characterization is amazing.   But I can’t like a book when I hate the main character.

The thing with Madame Bovary, though, is that the food plays an essential role in the progression (or regression) of the title character. You see, Emma Bovary’s life falls into a negative spiral because she experiences little tastes of luxury, and wants more and more until she is incapable of being happy. Her first taste of luxuriousness was at her wedding, where her family served her and Charles (the groom) a beautiful French feast.
 
Enter French Flan. Gustave Flaubert describes it through Emma and Charles’ eyes, who have never experienced such extravagant food:
 
“Big plates of yellow custard shuddered at the slightest bump of the table; they had the initials of the newlyweds traced on their smooth surfaces in arabesques of sugared almonds” (24-25).
 
Now, flan has a bad rap here in America because of Mexican flan. Mexicans do so many foods right, but flan is not one of them. Yellow Jello? No thanks.

If you don’t know, flan is simply a thick, mostly solid custard, just like Flaubert described. But instead of using gelatin to get that consistency, the French do it the right way – with lots of eggs, and some sort of thickener. I used cornstarch, but the more historically accurate way would have been with flour. I normally would use the more historically accurate method, but I was pressed for time preparing for a sudden and long trip to Finland, and I didn’t do enough research. Sorry! For a more true-to-the-times recipe, click here.

Here is the recipe I used, below. It was thick, rich, and very luxurious.  As a side note, I chose a crustless recipe on purpose.  This is because Flaubert describes that the yellow custard "shuddered" (a.k.a. jiggled).  I didn't see this happening with a crust to hold its shape.  That's the main reason I chose this recipe.

French Flan
View original recipe at Cooking with Corinne

2 cups milk
1/2 cup liquid cream
1/2 cup granulated sugar
5 egg yolks
3 1/2 tbsp cornstarch

In a large saucepan, add first the dry ingredients starting by cornstarch and sugar. Stir to combine. Add the egg yolks and combine until you get a smooth mixture. Add the cream and the milk at the end. 
Place the saucepan on the stove, and bring the mixture to a boil over low heat while stirring constantly. Cook the mixture for about 10 minutes while keeping stirring.
Cover the bottom of a springform pan with parchment paper. Butter and flour the sides.
Pour the mixture in the pan. Reserve at least one hour in the fridge.
Preheat oven to 340°F and bake for 15 minutes.
Leave a room temperature to cold. Unstick the sides with a knife and remove the flan from the spring-form pan. Serve cold.

Before heating

Heated for 10 minutes after boiling.  See how it's thick enough to leave lines in the custard?
Baked

Confessions time: I cheated and used butter + milk instead of cream, since I didn't have any on hand.  I also didn't use a springform pan -- I just used a regular 8" round cake pan.  Even with these cheats, everything turned out fine.

For the sugared almonds tracing the couple's initials, I should have used this recipe, but again, I was in a hurry and only did cursory research.  So here's what I actually did, below.  I also used almond slices instead of whole almonds, which I later crushed to make them easier to work with.

Sugared Almonds
View original recipe here
  • 1 cup whole blanched almonds
  • 1/2 cup sugar
  • 2 tablespoons butter
  • 1/2 teaspoon vanilla extract
  • 3/4 teaspoon salt
Heat almonds, sugar and butter in a heavy skillet over medium heat. Cook, stirring constantly, until almonds are toasted and sugar is a golden brown, about 15 minutes. Stir in vanilla. Spread on aluminum foil; sprinkle with salt. Cool and break into clusters.
 
I kind of botched my sugared almonds by letting them cook too long. As soon as they barely start turning brown, get them off the burner! They’ll keep cooking (and quickly) even after you remove it from the heat).
 
When I should have removed it from the heat.  See how it's just barely starting to get brown on some of the sides?
When I actually removed it from the heat.  It got here in about 1 minute.  It cooks fast!
sugared almonds, cooled and crushed
I crushed my almonds with a rolling pin once they were cool and used the crumbs to monogram Charles and Emma Bovary’s initials onto the custard, as described. The sugar will start to dissolve on the damp custard, so you have to be very careful not to mess up. Either that or create a stencil, which is what I should have done.
 
 
I ate the E first, because I dislike Emma so much and think she ruins everything she’s a part of.  But the flan tasted fabulous!

Friday, July 15, 2011

Knickerbocker Glory

You all tired from staying up to watch the midnight showing Harry Potter? I am, but it was so so worth it! Now that the series is over you are going to need to console yourself with some ice cream! So what better ice cream treat to have than the lavish knickerbocker glory from the first book?

"They ate in the zoo restaurant, and when Dudley had a tantrum because his knickerbocker glory didn't have enough ice cream on top, Uncle Vernon bought him another one and Harry was allowed to finish the first," (Rowling 26).

So the name knickerbocker, is what they used to call the Dutch in New England or you may know it as a type of pants. So the name originated in America, but nobody really knows what's up with the English stealing it for an ice cream sundae.

This is another easy one to make and it's kind of go with the flow like the trifle was.

  1. Get a tall glass (like the type traditionally used to serve milk shakes).
  2. Chop fruit into small slices or pieces. Ideally use colorful fruits like peaches, grapes, strawberries, melon or banana. Place these in the base of the glass.
  3. Add three scoops of ice cream on top of the fruit. A minimum 2 scoops of vanilla ice cream is the usual amount.
  4. Pour a fruit sauce over the ice cream - Melba (peach) sauce is traditional. Many other recipes call for Jell-O or jelly to put in the middle instead.
  5. Top this with thick whipped cream.
    • Put a cherry on top and add an ice cream wafer. Other toppings could include nuts or more fruit sauce. I added a Starburst on top, but I had them and I like them, don't judge me.
  6. Serve chilled along with a long ice cream spoon and a large napkin.

I adapted this recipe from here.

I used fresh peaches and peach Jell-O in the middle of mine, it tastes excellent!

A toast to the Boy Who Lived who helped shape our childhoods, cheers!

Sunday, July 10, 2011

Trifle

Hey! It's Anna, back to give you the first of many Harry Potter dessert recipes. Trifle is mentioned in several books. The first time is in Sorcerer's Stone, at the start of term feast.
"A moment later the desserts appeared. Blocks of ice cream in every flavor you could think of, apple pies, treacle tarts, chocolate éclairs and jam doughnuts, trifle, strawberries, Jell-O, rice pudding..." (Rowling 125).
I have a copy of Sorcerer's Stone, like most of you, but in Philosopher's Stone (the British version), instead of Jell-O they say jelly in the UK. The British don't use jam and jelly interchangeably like we do, jam and jelly is jam to them and jelly for them is Jell-O for us. Everything clear as mud now? Good, today we're going to focus on trifle, not Jell-O. I don't know about you guys, but I really like chocolate, so we are going to look at a chocolate trifle recipe.

Ingredients
**
Note: You can easily substitute many of these ingredients for something similar, or even add ingredients it doesn't call for like strawberries, get creative! There's already brownies in it, you pretty much can't go wrong!

  • 1 (19.8 ounce) package brownie mix
  • 1 (3.9 ounce) package instant chocolate pudding mix (try cheesecake pudding mix for fun)
  • 1/2 cup water
  • 1 (14 ounce) can sweetened condensed milk
  • 1 (8 ounce) container frozen whipped topping, thawed. Feel free to substitute French Vanilla flavored Cool Whip, or even just use whipping cream in it's place.
  • 1 (12 ounce) container frozen whipped topping, thawed
  • 1 (1.5 ounce) bar chocolate candy, or use chocolate chips, or chop up some candy bars instead
  1. Prepare brownie mix according to package directions and cool completely. (I know, I know, smelling those warm brownies right from the oven and not letting you eat them is really mean, but it'll be worth it I promise.) Cut into 1 inch squares.
  2. In a large bowl, combine pudding mix, water and sweetened condensed milk. Mix until smooth, then fold in 8 ounces whipped topping until no streaks remain.
  3. In a trifle bowl or glass serving dish, place half of the brownies, half of the pudding mixture and half of the 12 ounce container of whipped topping. Repeat layers. Shave chocolate onto top layer for garnish. Refrigerate 8 hours before serving.
Here's my own personal trifle, I added some caramel in the middle and a peanut butter cup on top. My family loved being able to personalize their own cup, but we're all wishing we weren't out of milk! Enjoy!

Thursday, June 2, 2011

Danish Dessert and 'Farvel'!

Okay, I wish I had more time to post more of the tea party...but I'm going to have to leave you in the very capable hands of Mary Julia. Getting all the stuff ready for a mission has been a ton of work and extremely time consuming! Not to mention all the goodbyes that I've had to say.
I can't make this a long post, because I'm not supposed to be on the computer long, but the plan for the next year and a half is that I'll find some cool Danish recipes while on my mission in Denmark and send them back! I hope to see you all in 18 months!
Without further ado, here is Danish Dessert

It came in a box and I followed the directions...woohoo! It was a lot like Jell-o but more tart. It said on the box it was made in New Jersey or something...so that was a disappointment. It told me to add strawberries or raspberries and I happened to have some! It thickened really quick and was REALLY bright red. I enjoyed it and so did my parents! I would have gotten Cool Whip for it though, to add a little more sweetness. It would have been neat as a parfait too!


I made two other Danish recipes lately for my Farewell party. I unfortunately didn't take pictures...but I'll post the recipes here really quick!

This first one is Risalamande which is a almond and rice pudding with cherry sauce. It is traditionally served at Christmas and oh my gosh! I could eat it everyday. It was surprisingly easy and sooooo delicious! I can't wait until Christmas in Denmark!

http://www.dianasdesserts.com/index.cfm/fuseaction/recipes.recipeListing/filter/dianas/recipeID/387/Recipe.cfm

This second one didn't give much information about its origin. They are called Danished Glazed Mushrooms and they were also delicious and SUPER easy!

http://www.food.com/recipe/danished-glazed-mushrooms-135210

I hope to come back to many followers who have become big fans of our blog! I hope Mary doesn't get mad at me for contributing so little! 'Farvel' for 18 months, blogosphere!